
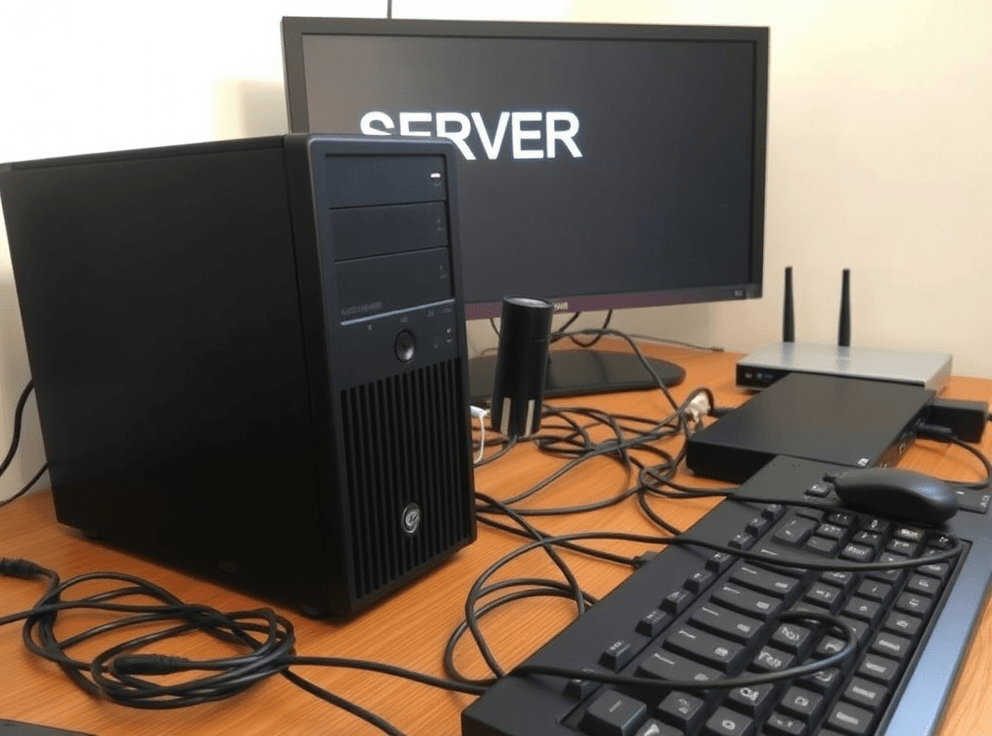
How to Build a Personal Server: A Beginner’s Guide to Affordable Self-Hosting (2025 Edition)
Ever felt frustrated by cloud storage fees creeping up? Worried about who really has access to your data on big tech platforms? Or maybe you’re just a tech enthusiast itching for a project that gives you ultimate control? If any of these resonate, then building your own personal server might be the perfect next step for you.
It sounds intimidating, right? “Building a server” conjures images of blinking lights in a freezing data center. But here’s the secret: a personal server is essentially just a dedicated computer, optimized for specific tasks, running right from your home or office. And the best part? It’s more accessible and affordable than ever, especially with resources like Jabardeal helping you find the best deals on hardware.
Why bother? The benefits are huge: “enhanced privacy and security to unparalleled customization and learning opportunities.” [1] You get complete control over your data, the ability to tailor services exactly to your needs (think media streaming, file sharing, backups, hosting websites, or even running game servers), and an incredible hands-on learning experience. Plus, in the long run, it can be significantly more cost-effective than relying solely on subscription services.
This guide is designed for beginners – the tech enthusiasts, DIYers, small business owners, and freelancers looking to take control. We’ll walk you through the essentials, demystify the hardware, explore operating system choices, and guide you through the basic setup process. Let’s build your own corner of the cloud!
Why Bother Building a Personal Server?
Before diving into the nuts and bolts, let’s solidify why this project is worth your time and effort. It’s not just about saving a few bucks on cloud storage (though that’s a nice perk). Building a personal server offers a unique blend of control, customization, and learning.
- Ultimate Control & Privacy: This is perhaps the biggest draw. When you host your own services, you control the data. No third-party terms of service to worry about, no scanning of your files for advertising purposes. Your data stays on your hardware, under your roof.
- Unmatched Customization: Want a media server that organizes your movie collection exactly how you like it? Need a file-sharing system tailored to your family or small business workflow? Fancy hosting a private game server for your friends? A personal server lets you build precisely what you need, choosing the software and configurations that work best for you. Common uses include:
- File Server/Personal Cloud: Centralized storage accessible from all your devices (like Dropbox or Google Drive, but yours).
- Media Server: Stream your movies, music, and photos using software like Plex, Emby, or Jellyfin.
- Backup Hub: Automate backups for all your computers and devices.
- Web Server: Host your own website, blog, or web applications.
- Game Server: Run dedicated servers for games like Minecraft, Valheim, etc.
- Home Automation Hub: Centralize control for smart home devices (e.g., using Home Assistant).
- Virtualization/Containers: Run multiple operating systems or isolated applications (using tools like Docker) for testing, development, or learning.
- Cost-Effectiveness (Long-Term): While there’s an initial hardware investment, running your own server can save significant money over time compared to paying monthly fees for multiple cloud services (storage, streaming, hosting, etc.). Jabardeal specializes in finding affordable hardware to maximize this benefit.
- Invaluable Learning Experience: Building and managing a server is one of the best ways to learn about hardware, operating systems (especially Linux), networking, security, and troubleshooting. These are highly transferable skills in today’s tech-driven world.
- Enhanced Security (Potentially): While you become responsible for security, you also gain granular control. You can implement security measures tailored to your needs, potentially exceeding the generic security of some consumer cloud services if done correctly.
Building a server isn’t just about the end result; it’s about the journey of creation, learning, and empowerment.
Demystifying Server Hardware: The Core Components
Okay, let’s talk hardware. Don’t let the term “server hardware” scare you. For a personal or home server, you’re essentially building a specialized PC. You don’t necessarily need enterprise-grade, rack-mounted gear (unless you want to!). Often, standard desktop components, carefully chosen for reliability and efficiency, will do the job perfectly, especially when you’re starting out. Here’s a breakdown of the key components: [2] [3] [4] [5]
1. CPU (Central Processing Unit)
- What it is: The “brain” of your server, executing instructions and performing calculations. [2:1] [3:1]
- What matters:
- Cores/Threads: More cores allow the server to handle more tasks simultaneously. For a basic file or media server, a 4-core CPU (like an Intel Core i3 or AMD Ryzen 3) is often sufficient. For virtualization or heavier workloads, consider 6+ cores (Core i5/Ryzen 5 or higher). [2:2] [5:1]
- Clock Speed (GHz): How fast the CPU processes instructions. Higher is generally better, but core count is often more critical for server tasks. [2:3]
- Integrated Graphics (iGPU): Many CPUs include built-in graphics capabilities. For most servers (file sharing, basic web hosting, backups), you don’t need a separate, dedicated graphics card (GPU). An iGPU is usually enough for setup and basic troubleshooting. CPUs labelled with an “F” (Intel) or sometimes “G” (AMD, though these often do have graphics) may lack integrated graphics, requiring a dedicated GPU even for basic video output. [2:4] [3:2]
- Power Efficiency (TDP): Servers often run 24/7, so a CPU with lower power consumption (Thermal Design Power or TDP) can save on electricity bills.
- Jabardeal Tip: Look for slightly older generation CPUs or budget-friendly lines like Intel Core i3/i5 or AMD Ryzen 3/5 for excellent value. Check compatibility with your chosen motherboard!
2. RAM (Random Access Memory)
- What it is: The server’s short-term “working” memory, used for multitasking and quick data access. It’s volatile, meaning data is lost when the power is off. [2:5] [3:3]
- What matters:
- Capacity: This is crucial. For a basic file server or simple tasks, 8GB might suffice, but 16GB is a highly recommended minimum for smoother operation and future flexibility. [4:1] [5:2] If you plan on running virtual machines, containers (Docker), or more demanding applications (like TrueNAS with ZFS), aim for 32GB or even 64GB. [3:4] [6]
- Type (DDR4/DDR5): Must match what your motherboard supports. DDR4 is often more budget-friendly and perfectly adequate for many server tasks. DDR5 is newer and faster but usually comes at a higher cost for both RAM and compatible motherboards. [7] [3:5]
- Speed (MHz): Faster RAM can help, but capacity is generally more important for server workloads than raw speed. Ensure the speed is supported by your motherboard and CPU. [3:6]
- ECC (Error-Correcting Code) RAM: This type of RAM can detect and correct common data corruption errors. It’s often found in enterprise servers but can be used in home builds if the CPU and motherboard support it (common with AMD Ryzen Pro, Intel Xeon, some consumer AMD chipsets). It adds cost and isn’t strictly necessary for most beginners but offers peace of mind for critical data.
- Jabardeal Tip: 16GB of DDR4 RAM offers a great balance of performance and cost for beginner servers. Check motherboard compatibility before buying!
3. Storage (SSD/HDD)
- What it is: Long-term, non-volatile storage for your operating system, applications, and data. [2:6] [3:7]
- What matters:
- Type (SSD vs. HDD):
- SSD (Solid State Drive): Uses flash memory. Significantly faster read/write speeds, lower power consumption, silent operation, more durable (no moving parts). Ideal for installing the operating system and frequently accessed applications for responsiveness. NVMe SSDs (which use PCIe slots/M.2 connectors) are much faster than older SATA SSDs. [2:7] [3:8] [4:2]
- HDD (Hard Disk Drive): Uses spinning magnetic disks. Slower than SSDs but offers much larger storage capacities at a lower cost per gigabyte. Excellent for storing large amounts of data like media files, backups, or archives. Often used in NAS (Network Attached Storage) setups. [2:8] [3:9]
- Capacity: Depends entirely on your needs. Start with at least a 256GB-512GB SSD for the OS. For data storage (especially media or backups), consider 1TB, 2TB, 4TB or larger HDDs. Plan for growth! [3:10] [5:3]
- Interface: NVMe (M.2 slot on motherboard) for fastest SSDs, SATA (cables to motherboard) for 2.5" SSDs and 3.5" HDDs. Ensure your motherboard has enough ports/slots. [2:9]
- NAS-Specific HDDs: If building a NAS that will run 24/7 with multiple drives, consider HDDs specifically designed for NAS use (e.g., WD Red, Seagate IronWolf). They are built for continuous operation and vibration tolerance.
- RAID (Redundant Array of Independent Disks): A technique using multiple drives to improve performance or provide data redundancy (protection against drive failure). Common RAID levels include RAID 1 (mirroring), RAID 5/6 (striping with parity). This is often managed by the OS (like TrueNAS or Unraid) or a dedicated hardware RAID card (less common for home servers). [8] [6:1] [9]
- Type (SSD vs. HDD):
- Jabardeal Tip: A common budget-friendly strategy is a smaller, fast SSD for the OS and applications, paired with one or more large HDDs for bulk data storage. [3:11]
4. Motherboard
- What it is: The main circuit board connecting all components. It dictates compatibility. [2:10] [3:12]
- What matters:
- CPU Socket Compatibility: Must match your chosen CPU (e.g., LGA 1700 for recent Intel, AM4/AM5 for recent AMD). [3:13] [6:2]
- Chipset: Determines features like the number of SATA/USB ports, PCIe lanes, and overclocking capabilities (less relevant for basic servers). Common chipsets include Intel’s B760/Z790 or AMD’s A520/B550/B650/X670. [2:11] [3:14]
- RAM Slots & Type: Must match your RAM (DDR4 or DDR5) and support the capacity you need. [2:12] [3:15]
- Storage Ports: Ensure enough SATA ports for your HDDs/SSDs and M.2 slots if using NVMe SSDs. [2:13] [3:16]
- Expansion Slots (PCIe): Needed if you plan to add a dedicated GPU, network card, or other expansion cards. Check the type (PCIe 3.0/4.0/5.0) and size (x16, x8, x4, x1). [2:14] [7:1]
- Form Factor: Determines the physical size (ATX, Micro-ATX, Mini-ITX). Must match your case. Smaller form factors have fewer expansion slots and ports. [2:15] [4:3]
- Networking: Most motherboards have built-in Gigabit Ethernet (1Gbps). Some offer faster 2.5Gbps or even 10Gbps Ethernet. Built-in Wi-Fi can be convenient but isn’t essential for a server (wired is more reliable). [3:17] [5:4]
- BIOS/UEFI: Firmware used to initialize hardware during boot. Look for features like easy BIOS updates (Q-Flash Plus or similar allows updates without a CPU installed, useful for ensuring compatibility with newer CPUs). [2:16] [6:3]
- IPMI (Intelligent Platform Management Interface): More common on server-grade motherboards. Allows remote management (power on/off, monitoring, KVM) even if the OS is down. Not essential for beginners but very useful. [5:5]
- Jabardeal Tip: Don’t overspend, but don’t skimp either. Choose a reliable board with the ports and slots you need now, plus a little room for future expansion. Check CPU and RAM compatibility lists on the manufacturer’s website.
5. PSU (Power Supply Unit)
- What it is: Converts AC power from the wall outlet to DC power usable by your components. [2:17] [3:18]
- What matters:
- Wattage: Calculate the total power draw of your components (CPU, motherboard, drives, GPU if any) and add a buffer (30-50% headroom is safe). A 450W-650W PSU is often sufficient for typical home servers unless you have many drives or a power-hungry GPU. [4:4] [6:4] [5:6]
- Efficiency Rating (80 Plus): Indicates how efficiently the PSU converts power (Bronze, Silver, Gold, Platinum, Titanium). Higher ratings mean less wasted energy (heat) and potentially lower electricity bills. 80 Plus Bronze or Gold is a good target for value. [2:18] [4:5] [6:5]
- Modularity:
- Non-Modular: All cables are permanently attached. Cheapest, but cable management can be messy.
- Semi-Modular: Essential cables (motherboard, CPU) are attached; others (PCIe, SATA) are detachable. Good balance.
- Fully-Modular: All cables are detachable. Easiest for cable management and airflow, but usually costs more. [2:19] [3:19] [6:6]
- Reliability: Crucial for a server. Stick to reputable brands (e.g., Corsair, Seasonic, EVGA, Cooler Master, Thermaltake) and check reviews. A failing PSU can damage other components. [2:20] [6:7]
- Jabardeal Tip: Invest in a quality PSU from a known brand with an 80 Plus Bronze or Gold rating and slightly more wattage than you currently need for future upgrades.
6. Case
- What it is: The enclosure that houses all your components. [3:20] [5:7]
- What matters:
- Motherboard Compatibility: Must support your motherboard’s form factor (ATX, Micro-ATX, Mini-ITX). [2:21]
- Drive Bays: Ensure enough 3.5" bays for HDDs and 2.5" bays/mounts for SSDs. Consider future expansion. [5:8]
- Airflow: Crucial for keeping components cool, especially in a 24/7 server. Look for mesh front panels and ample fan mounts. [3:21] [6:8]
- Size & Space: Enough room for your components (including CPU cooler height and GPU length if applicable) and easy building/cable management. [5:9]
- Noise: Some cases offer noise-dampening features if quiet operation is a priority. [5:10]
- Jabardeal Tip: Prioritize airflow and drive capacity over flashy aesthetics for a server build. Cases like the Fractal Design Define series or Cooler Master NR series are popular choices.
7. Cooling
- What it is: Systems to dissipate heat generated by components, primarily the CPU. [2:22] [3:22]
- What matters:
- CPU Cooler:
- Stock Cooler: Often included with lower/mid-range CPUs. Can be adequate but sometimes noisy or insufficient for heavy loads. [6:9] [5:11]
- Aftermarket Air Cooler: Tower coolers with heat pipes and fans. Offer better cooling and quieter operation than stock coolers. Excellent value. Check case clearance. [6:10] [9:1]
- AIO (All-in-One) Liquid Cooler: Radiator, fans, pump, and water block. Can offer top-tier cooling, often quieter under load, but more complex and expensive. Check case compatibility for radiator size (e.g., 120mm, 240mm, 360mm). [6:11] [9:2]
- Case Fans: Essential for airflow. Most cases come with one or two. Adding more (intake at the front/bottom, exhaust at the rear/top) improves cooling significantly. [3:23] [6:12]
- CPU Cooler:
- Jabardeal Tip: For most beginner servers running 24/7, a good aftermarket air cooler offers the best balance of performance, reliability, and cost. Ensure good case airflow with intake and exhaust fans.
8. (Optional) GPU (Graphics Processing Unit)
- What it is: Specialized processor for rendering images and video. [2:23] [3:24]
- Do you need one? For most basic home servers (file sharing, backups, headless Linux operation), NO. If your CPU has integrated graphics (iGPU), that’s sufficient for initial setup and troubleshooting via a monitor. [2:24] [5:12]
- When you might need one:
- Media Transcoding: Software like Plex can use a GPU (especially Nvidia GPUs with NVENC) to accelerate video transcoding (converting formats on-the-fly for different devices), significantly reducing CPU load. [10]
- Virtualization with GPU Passthrough: Assigning a dedicated GPU to a virtual machine (e.g., for a gaming VM or video editing VM). [6:13]
- AI/Machine Learning Tasks: Specific workloads that leverage GPU acceleration.
- CPU without Integrated Graphics: If your chosen CPU (like an Intel “F” series) lacks an iGPU, you’ll need some basic GPU just to get video output for setup. A very cheap, low-end card will suffice.
- Jabardeal Tip: Start without a dedicated GPU unless you have a specific need like Plex transcoding. You can always add one later if your needs change (ensure your PSU can handle it).
Choosing the right components involves balancing performance, budget, and your specific needs. Don’t feel pressured to buy the absolute latest or most expensive parts. Reliability and compatibility are key for a server. Tools like PCPartPicker can help check compatibility between components before you buy.
Choosing Your Server’s Brain: Selecting an Operating System (OS)
With your hardware components picked out (or at least planned), the next crucial decision is the operating system (OS). The OS is the core software that manages the hardware and allows you to run applications and services. For servers, the choice usually boils down to Linux or Windows Server, with Linux being the overwhelming favorite in the home server and open-source community. [5:13] [9:3] [11] [12]
Linux: The Open-Source Powerhouse
Linux is generally the recommended choice for home servers due to its stability, flexibility, security, resource efficiency (it runs well on less powerful hardware), and the fact that most distributions are free and open-source. The command-line interface might seem daunting initially, but it’s incredibly powerful, and many server tasks are well-documented online. [9:4] [11:1] [12:1]
Here are some popular Linux distributions (distros) suitable for servers:
- Ubuntu Server: [9:5] [11:2] [12:2] [13]
- Pros: Extremely popular, large community support, extensive documentation, easy installation, LTS (Long-Term Support) versions offer 5+ years of updates, good hardware support, great for beginners transitioning to Linux servers.
- Cons: Some find it slightly more resource-heavy than other server distros (though still efficient).
- Best For: General-purpose servers, web hosting, cloud integration, Docker/container hosting, beginners.
- Debian: [9:6] [11:3] [12:3] [13:1]
- Pros: Rock-solid stability (it’s the foundation for Ubuntu), huge software repositories, strong focus on free/open-source principles, long release cycles.
- Cons: Stable branch can have older software versions, slightly less beginner-friendly setup than Ubuntu.
- Best For: Production servers where stability is paramount, users who prefer a minimal base to build upon.
- TrueNAS (CORE/Scale): [8:1] [14] [15] [9:7] [11:4]
- Pros: Purpose-built for NAS, excellent ZFS filesystem support (data integrity, snapshots, redundancy), web-based management GUI, TrueNAS Scale (Debian-based) adds Docker/Kubernetes support.
- Cons: Can be resource-intensive (especially ZFS needs RAM – 8GB minimum, 16GB+ recommended), potentially more complex initial storage setup than simpler options.
- Best For: Dedicated NAS builds, users prioritizing data integrity and advanced storage features.
- OpenMediaVault (OMV): [8:2] [15:1] [9:8] [11:5]
- Pros: Debian-based, lightweight, simple web interface for managing storage/shares, good plugin system (including Docker via Portainer), runs well on low-power hardware (like Raspberry Pi).
- Cons: Web interface might feel less polished than TrueNAS/Unraid, relies on plugins for some advanced features.
- Best For: Simple NAS setups, repurposing older hardware, users comfortable with Debian.
- Unraid: [6:14] [9:9] [11:6]
- Pros: User-friendly interface, unique storage approach (allows mixing drive sizes, parity protection), excellent Docker and VM support via GUI, large community app marketplace.
- Cons: Paid license (based on number of drives), boots from USB (license tied to USB), not truly open-source.
- Best For: Media servers, users wanting maximum storage flexibility, easy Docker/VM management.
- Fedora Server: [11:7] [12:4] [13:2]
- Pros: Cutting-edge features, closely related to Red Hat Enterprise Linux (RHEL), good for developers wanting the latest software, includes Cockpit web management tool.
- Cons: Shorter support cycles (needs more frequent upgrades), focus on newer tech might mean less stability than Debian/Ubuntu LTS.
- Best For: Developers, testing environments, users who want the latest Linux features.
- Other RHEL-based (AlmaLinux, Rocky Linux): [11:8] [12:5] [13:3] Free, enterprise-grade alternatives to RHEL, great stability and RHEL compatibility. Good for business environments or those familiar with Red Hat.
Windows Server
While less common for typical home servers due to cost and resource usage, Windows Server is a viable option, especially if: [5:14] [16] [17]
-
You are already heavily invested in the Microsoft ecosystem (Active Directory, etc.).
-
You need to run specific Windows-only applications.
-
You strongly prefer a familiar graphical user interface (GUI).
-
Pros: Familiar interface for Windows users, strong integration with Microsoft products, good hardware support.
-
Cons: Requires purchasing a license (can be expensive), generally more resource-intensive than Linux, less community support for open-source server applications compared to Linux.
Virtualization Platforms (Hypervisors)
Instead of installing a traditional OS directly, you can install a hypervisor – an OS designed specifically to run virtual machines (VMs). [6:15] [9:10]
- Proxmox VE: [6:16] [9:11]
- Pros: Open-source (Debian-based), powerful web interface, supports KVM (for full VMs) and LXC (for lightweight Linux containers), clustering features, ZFS support. Very popular for home labs.
- Cons: Can have a steeper learning curve than simpler NAS OS options, requires dedicated hardware (doesn’t run on top of another OS easily).
- Best For: Users wanting to run multiple different operating systems or isolated services on one machine, home lab enthusiasts.
Recommendation for Beginners:
For a first server, Ubuntu Server is often the best starting point. It strikes a great balance between ease of use, vast community support, and powerful features. If your primary goal is network storage with a friendly interface, OpenMediaVault or TrueNAS Scale are excellent alternatives. If you don’t mind a paid license for maximum flexibility and ease of use, Unraid is also very popular.
Putting It All Together: The Build Process
You’ve researched, planned, and ordered your components (hopefully scoring some deals via Jabardeal!). Now comes the exciting part: assembling your server. If you’ve built a PC before, this process will feel familiar. If not, don’t worry – it’s like adult Lego, but with a few more precautions. [6:17] [5:15]
Safety First!
- Static Electricity: Your biggest enemy. Work on a hard surface (not carpet), ground yourself frequently by touching a metal object (like the case frame), or use an anti-static wrist strap. Keep components in their anti-static bags until you’re ready to install them.
- Handle with Care: Hold components by their edges. Avoid touching the gold contacts or the circuitry.
- Read the Manuals: Your motherboard and case manuals are your best friends. They contain specific instructions for your hardware.
General Assembly Order (Consult Your Manuals!):
- Prepare the Case: Open the case and install motherboard standoffs if they aren’t pre-installed. Install the PSU (Power Supply Unit).
- Motherboard Prep (Outside the Case):
- Install the CPU onto the motherboard socket (align arrows/notches carefully, gently lower the retention lever).
- Install the RAM modules into the correct slots (check motherboard manual for dual-channel configuration, usually slots 2 and 4). They only fit one way; press down firmly until the clips on both ends snap into place.
- Install the CPU Cooler. This varies greatly depending on the type (stock, air tower, AIO). Follow the cooler’s instructions precisely. Apply thermal paste if not pre-applied to the cooler.
- (Optional) Install M.2 NVMe SSD(s) into the M.2 slots on the motherboard.
- Install Motherboard in Case: Carefully lower the prepared motherboard onto the standoffs in the case. Align the I/O shield (the panel with USB, Ethernet ports etc.) with the case opening. Secure the motherboard with screws (don’t overtighten).
- Install Storage Drives: Mount your 2.5" SSDs and/or 3.5" HDDs into the appropriate drive bays or mounting points in the case.
- (Optional) Install GPU/Expansion Cards: If using a dedicated graphics card or other PCIe cards (like a network card), install them into the appropriate PCIe slots.
- Wiring – The Fun Part! This is often the most intimidating step for beginners. Take your time and consult your motherboard manual:
- Main Power (24-pin ATX): Connect the largest connector from the PSU to the motherboard.
- CPU Power (4+4 pin or 8-pin EPS): Connect the CPU power cable(s) from the PSU to the socket near the CPU on the motherboard.
- SATA Power: Connect SATA power cables from the PSU to your SSDs and HDDs.
- SATA Data: Connect SATA data cables from the motherboard’s SATA ports to your SSDs and HDDs.
- (Optional) PCIe Power: If you installed a dedicated GPU, connect the required PCIe power cables (6-pin, 8-pin, or 12VHPWR) from the PSU to the GPU.
- Case Fans: Connect case fan cables to the fan headers on the motherboard (check manual for locations like
SYS_FAN,CHA_FAN). - Front Panel Connectors: Connect the small, fiddly cables from the case (power button, reset button, USB ports, audio jacks, LED indicators) to the corresponding pins on the motherboard. Your motherboard manual is ESSENTIAL here – these pins are tiny and specific.
- Cable Management: Try to route cables neatly using zip ties or Velcro straps. Good cable management improves airflow and makes future upgrades easier.
- Final Check: Double-check all connections. Ensure no loose screws are rattling around.
- Close the Case: Put the side panels back on.
Don’t Panic! Take breaks if you feel overwhelmed. There are countless video tutorials online demonstrating PC building step-by-step – search for guides specific to your case or motherboard type if needed. [6:18]
Bringing It to Life: OS Installation and Basic Setup
Hardware assembly complete? Awesome! Now it’s time to install the operating system and perform the initial configuration. We’ll use Ubuntu Server as our primary example, as it’s a popular and well-supported choice for beginners. [5:16] [10:1]
1. Create Bootable USB Drive:
- Download the OS: Go to the official website of your chosen OS (e.g., Ubuntu Server) and download the latest LTS (Long-Term Support) ISO image file.
- Get Flashing Software: Download a tool to write the ISO image to a USB drive. Popular options include Rufus (Windows), BalenaEtcher (Windows, macOS, Linux), or the built-in
ddcommand on Linux/macOS. [5:17] - Flash the USB: Use the software to select the downloaded ISO file and your USB drive (minimum 8GB recommended, ensure it has no important data as it will be erased). Start the writing process.
2. First Boot and BIOS/UEFI Setup:
- Connect Peripherals: Plug in a keyboard, monitor, and the bootable USB drive you just created into your newly built server.
- Power On & Enter BIOS/UEFI: Turn on the server. Immediately press the key to enter the BIOS/UEFI setup (Common keys are
DEL,F2,F10,F12,ESC– watch the screen prompts or check your motherboard manual). - Check Hardware Recognition: In the BIOS/UEFI, verify that the CPU, RAM, and storage drives are detected correctly.
- Set Boot Order: Find the boot settings and change the boot order to prioritize the USB drive first.
- Save and Exit: Save your changes and exit the BIOS/UEFI. The server should restart and boot from the USB drive.
3. Install the Operating System (Ubuntu Server Example):
- Language & Keyboard: Select your preferred language and keyboard layout.
- Network Configuration: The installer will attempt to configure networking via DHCP automatically if connected via Ethernet. You can configure a static IP address here if you prefer (recommended for servers), or do it later. [5:18]
- Storage Configuration: This is a critical step.
- Use Entire Disk: The simplest option for beginners with a single drive for the OS. It will erase the selected drive and partition it automatically.
- Manual/Custom: Gives you full control over partitioning. Useful if you have multiple drives or specific needs, but more complex.
- LVM (Logical Volume Management): Offers flexibility for resizing partitions later.
- Beginner Tip: If you have a dedicated SSD for the OS, choosing “Use Entire Disk” on that SSD is usually the easiest way to start.
- Profile Setup: Create your username, choose a strong password, and name your server (hostname).
- SSH Setup: Highly recommended! Choose to install the OpenSSH server. This allows you to connect remotely via the command line later. You can also import SSH keys from GitHub/Launchpad if you have them. [5:19]
- Featured Server Snaps (Optional): Ubuntu offers easy installation of popular server software (like Docker) via Snaps during setup. You can skip this and install software manually later if you prefer.
- Installation Progress: The installer will now copy files and install the system. This will take some time.
- Reboot: Once complete, remove the USB drive and reboot the server.
4. Initial Login and Updates:
- After rebooting, you should see a login prompt (command line). Log in with the username and password you created during installation.
- Update the System: It’s crucial to update your system immediately to get the latest security patches and software updates. Run the following commands:
(You’ll be prompted for your password. Note that characters won’t appear as you type – this is normal.)sudo apt update sudo apt upgrade -y
5. Static IP Configuration (If not done during install):
Having a predictable IP address is essential for a server. If you didn’t set a static IP during installation, you’ll want to do it now. The method depends on your OS version (Ubuntu uses Netplan).
- Find your network interface name (e.g.,
eth0,enp3s0):ip a - Edit the Netplan configuration file (usually in
/etc/netplan/):sudo nano /etc/netplan/00-installer-config.yaml(the filename might vary). - Modify it for a static IP (replace values with your network’s details):
network: ethernets: enp3s0: # Replace with your interface name dhcp4: no addresses: [192.168.1.100/24] # Choose an IP outside your router's DHCP range gateway4: 192.168.1.1 # Your router's IP nameservers: addresses: [8.8.8.8, 1.1.1.1] # Google & Cloudflare DNS version: 2 - Apply the changes:
sudo netplan apply
Congratulations! Your server OS is installed and has basic network connectivity. Now you can start making it useful.
Making It Useful: Installing Server Software
Your server is built, the OS is running – now what? The real power comes from the services you run on it. What you install depends entirely on your goals. Here are a few common examples and general approaches: [5:20] [10:2]
General Installation Methods (Ubuntu/Debian):
- APT Package Manager: The primary way to install software.
- Update package lists:
sudo apt update - Search for software:
apt search <package_name> - Install software:
sudo apt install <package_name> - Remove software:
sudo apt remove <package_name>
- Update package lists:
- Snaps: Canonical’s containerized package format. Often easy to install but sometimes have limitations.
- Install:
sudo snap install <snap_name>
- Install:
- Docker Containers: A very popular method for running applications in isolated environments. This keeps your base OS clean and simplifies deployment. You’d first install Docker (
sudo apt install docker.io docker-compose -y), then run containers usingdocker runordocker-compose. [6:19] [9:12]
Example Service Setups:
-
File Server (Samba for Windows/Mac compatibility): [5:21]
- Install Samba:
sudo apt install samba - Create a directory to share:
sudo mkdir -p /srv/samba/myshare - Set permissions (allow Samba users access):
sudo chown nobody:nogroup /srv/samba/myshare(adjust ownership/permissions as needed for security). - Edit Samba config:
sudo nano /etc/samba/smb.conf - Add a share definition at the end:
[MyShare] comment = My Shared Files path = /srv/samba/myshare read only = no browsable = yes guest ok = no # Require login valid users = @smbusers # Or specific usernames - Create a Samba user group (if using
@smbusers):sudo groupadd smbusers - Add your user to the group:
sudo usermod -aG smbusers your_linux_username - Create a Samba password for your user (separate from Linux login):
sudo smbpasswd -a your_linux_username - Restart Samba:
sudo systemctl restart smbd nmbd - Now you should be able to connect from Windows Explorer (
\\your_server_ip\MyShare) or macOS Finder (smb://your_server_ip/MyShare).
- Install Samba:
-
Media Server (Plex/Emby/Jellyfin): [10:3] [18] [19]
- These often have dedicated
.debpackages for download from their websites or can be run easily via Docker. - Plex Example (Download .deb):
- Download the latest Plex Media Server
.debfile from the Plex Downloads page. - Install it:
sudo dpkg -i plexmediaserver_*.deb(replace*with the actual filename). Fix dependencies if needed:sudo apt --fix-broken install - Access the web UI (usually
http://your_server_ip:32400/web) to configure libraries pointing to your media folders.
- Download the latest Plex Media Server
- Jellyfin Example (APT):
- Follow the official Jellyfin instructions for Debian/Ubuntu repository setup: Jellyfin Linux Install Guide
- Install:
sudo apt install jellyfin - Access the web UI (usually
http://your_server_ip:8096) for setup.
- These often have dedicated
-
Web Server (Nginx Example):
- Install Nginx:
sudo apt install nginx - Start & Enable:
sudo systemctl start nginx,sudo systemctl enable nginx - Place your website files in
/var/www/html/. - Access via
http://your_server_ip. Configuration files are in/etc/nginx/.
- Install Nginx:
-
Docker & Portainer (Web UI for Docker):
- Install Docker & Docker Compose:
sudo apt install docker.io docker-compose -y - Add user to docker group (to run docker without sudo):
sudo usermod -aG docker $USER(Log out and back in for this to take effect). - Install Portainer (Web UI):
docker volume create portainer_data docker run -d -p 8000:8000 -p 9443:9443 --name portainer --restart=always -v /var/run/docker.sock:/var/run/docker.sock -v portainer_data:/data portainer/portainer-ce:latest - Access Portainer via
https://your_server_ip:9443. Now you can manage containers, images, volumes, etc., through a web interface.
- Install Docker & Docker Compose:
Remember to configure your firewall (see next section) to allow access to the ports used by your services (e.g., Samba ports 139/445, Plex port 32400, Nginx port 80/443, Portainer port 9443).
The possibilities are vast. Explore documentation for the specific software you want to run. Docker significantly simplifies running multiple services without conflicts.
Securing Your Server: Essential First Steps
Running a server, even at home, means taking security seriously. You’re potentially exposing services to your network or even the internet. Here are fundamental security practices: [5:22] [9:13] [20]
-
Keep Everything Updated: This is non-negotiable. Security vulnerabilities are constantly discovered. Regularly update your OS and all installed software.
sudo apt update sudo apt upgrade -yConsider enabling automatic security updates on Ubuntu Server.
-
Use Strong Passwords: Ensure your user account (and any service accounts) have strong, unique passwords. Use a password manager.
-
Configure the Firewall: A firewall controls network traffic in and out of your server. Ubuntu uses
ufw(Uncomplicated Firewall).- Check Status:
sudo ufw status(likely inactive by default) - Allow Essential Services (Example: SSH):
sudo ufw allow ssh(orsudo ufw allow 22/tcp) - Allow Other Services (Examples):
- Samba:
sudo ufw allow samba(or ports 137,138/udp & 139,445/tcp) - Plex Web UI:
sudo ufw allow 32400/tcp - Nginx Web Server:
sudo ufw allow 'Nginx Full'(allows HTTP/80 and HTTPS/443)
- Samba:
- Enable the Firewall:
sudo ufw enable(Confirm ‘y’) - Deny by Default: UFW denies incoming connections by default unless explicitly allowed.
- Check Status:
-
Use SSH Keys (Disable Password Login): Password logins for SSH are vulnerable to brute-force attacks. SSH keys are far more secure.
- Generate Key Pair (on your client machine):
ssh-keygen -t rsa -b 4096(Follow prompts, optionally set a passphrase for the key). - Copy Public Key to Server:
ssh-copy-id your_username@your_server_ip(Enter your server password when prompted). - Test Login: Try logging in via SSH:
ssh your_username@your_server_ip. It should now log you in without a password (or ask for your key passphrase if you set one). - (Optional but Recommended) Disable Password Login:
- Edit SSH config on server:
sudo nano /etc/ssh/sshd_config - Find the line
#PasswordAuthentication yes(or similar). Uncomment it (remove#) and changeyestono. - Find
#PermitRootLoginand ensure it’s set toprohibit-passwordorno. - Save the file (Ctrl+O, Enter) and exit (Ctrl+X).
- Restart SSH service:
sudo systemctl restart sshd
- CRITICAL: Ensure you can log in with your SSH key before restarting the SSH service after disabling passwords!
- Edit SSH config on server:
- Generate Key Pair (on your client machine):
-
Minimize Attack Surface: Don’t install unnecessary software. If a service isn’t needed, disable or remove it.
-
(Optional) Fail2ban: This tool monitors log files for malicious activity (like repeated failed login attempts) and automatically updates firewall rules to block the offending IP addresses.
- Install:
sudo apt install fail2ban - It works out-of-the-box for SSH, but can be configured for other services.
- Install:
Security is an ongoing process, not a one-time setup. Stay informed about best practices and keep your system patched.
Accessing Your Server Remotely
One of the main advantages of a server is accessing its resources from other devices, whether on your local network or from anywhere in the world. Here are the common methods: [5:23] [20:1]
-
SSH (Secure Shell):
- What: Secure command-line access to your server. Essential for administration, managing files, running commands, and troubleshooting.
- How (Client):
- Linux/macOS: Use the built-in
sshcommand:ssh your_username@your_server_ip - Windows: Use PowerShell (
ssh your_username@your_server_ip), PuTTY, or Windows Subsystem for Linux (WSL).
- Linux/macOS: Use the built-in
- Prerequisites: OpenSSH server installed and running on the server (
sudo apt install openssh-server), firewall allowing port 22 (or your custom SSH port). - Security: Use SSH keys instead of passwords (as described in the security section).
-
VPN (Virtual Private Network):
- What: Creates a secure, encrypted tunnel between your remote device and your home network. Once connected, your remote device acts as if it’s on your local network, allowing access to all local resources (Samba shares, web UIs, etc.) securely.
- How: Requires setting up a VPN server on your network (either on your server itself or sometimes on your router). Popular self-hosted options include WireGuard (modern, fast) or OpenVPN.
- Setup: Can be complex for beginners. Requires configuring the server, generating client configurations/keys, and potentially setting up port forwarding on your router. Many tutorials exist online (search for “setup wireguard server ubuntu” or similar).
- Benefit: Most secure way to access all your home network services remotely.
-
Remote Desktop:
- What: Provides graphical access to your server’s desktop environment (if one is installed). Less common for Linux servers (which often run headless – without a GUI), but useful if needed.
- How (Linux): Requires installing a desktop environment (like XFCE or LXDE for lightweight options) and a remote desktop server (like VNC or xRDP).
- Example (xRDP on Ubuntu with XFCE):
Then connect using a Remote Desktop client (like Windows Remote Desktop Connection) tosudo apt install xfce4 xfce4-goodies xrdp -y sudo systemctl enable xrdp sudo ufw allow 3389/tcp # Allow RDP portyour_server_ip.
- Example (xRDP on Ubuntu with XFCE):
- How (Windows Server): Built-in Remote Desktop Protocol (RDP). Enable it in System Properties -> Remote Desktop.
- Security: Ensure strong passwords or network-level authentication. Accessing RDP directly over the internet is generally discouraged; use it over a VPN for better security.
-
Specific Service Web UIs:
- Many server applications (Plex, Portainer, TrueNAS, OMV, Home Assistant, etc.) provide their own web-based interfaces for management and access.
- Local Access:
http://your_server_ip:port_number - Remote Access: Usually requires accessing via VPN or setting up a reverse proxy (like Nginx Proxy Manager) with port forwarding and potentially a domain name for secure HTTPS access (more advanced).
For beginners, SSH is essential for management. For accessing file shares or web UIs remotely, setting up a VPN like WireGuard is the most secure and recommended method, though it takes more effort initially.
Keeping It Running: Monitoring and Maintenance
Your server is built, secured, and serving its purpose. But the job isn’t quite done. Like any machine, it needs ongoing monitoring and maintenance to ensure it runs smoothly, securely, and reliably for the long haul. [5:24] [20:2]
Monitoring: Keeping an Eye on Things
Regularly checking your server’s health helps you spot potential issues before they become major problems.
- Resource Usage:
htop: An interactive command-line process viewer. Shows CPU usage (per core), RAM usage, running processes, load average. Install withsudo apt install htop. Essential for quickly seeing what’s taxing your system. [5:25]df -h: Shows disk space usage for all mounted filesystems. Keep an eye on capacity, especially on your OS drive.free -h: Shows RAM usage (total, used, free, cache).
- System Logs: Logs contain records of system events, errors, and application messages. Crucial for troubleshooting.
- Key logs are usually in
/var/log/. Examples:syslogormessages: General system messages.auth.log: Login attempts, sudo usage.kern.log: Kernel messages.- Application-specific logs (e.g.,
/var/log/nginx/error.log).
- Use commands like
tail -f /var/log/syslogto watch logs in real-time orless /var/log/syslogto browse. Tools likelogwatchcan summarize logs daily. [5:26]
- Key logs are usually in
- Network Activity:
ss -tulnpornetstat -tulnp: Show open network ports and the services listening on them.iftop: Command-line tool to monitor network bandwidth usage in real-time (sudo apt install iftop).
- Hardware Health (SMART): Monitor the health of your storage drives.
- Install
smartmontools:sudo apt install smartmontools - Check drive health:
sudo smartctl -a /dev/sda(replace/dev/sdawith your drive identifier). Look for errors or warnings. [5:27]
- Install
- More Advanced Tools (Optional): For comprehensive monitoring, tools like Nagios, Zabbix, or the combination of Prometheus and Grafana offer powerful dashboards and alerting, but have a steeper learning curve. [5:28]
Maintenance: Proactive Care
Regular upkeep prevents problems and ensures security.
- Regular Updates: As mentioned in security, keep your OS and applications patched. Run
sudo apt update && sudo apt upgrade -yfrequently (weekly is a good practice). - Backups: If your server holds important data, backups are non-negotiable.
- Strategy (3-2-1 Rule): 3 copies of your data, on 2 different media types, with 1 copy offsite.
- Tools:
rsyncfor simple file copies, BorgBackup for efficient, encrypted, deduplicated backups, or built-in features of NAS OS like TrueNAS (snapshots) or Unraid. - Destination: Another drive on the server, a separate NAS, an external USB drive, or cloud storage.
- Testing: Regularly test your backups to ensure you can actually restore data from them! [5:29]
- Log Rotation/Cleanup: Ensure logs don’t fill up your disk space. Most systems handle log rotation automatically (
logrotate), but check occasionally. Clean up old packages:sudo apt autoremove -y. - Reboot Occasionally: While Linux servers are known for uptime, occasional reboots (e.g., after kernel updates) can be necessary and sometimes clear up minor issues.
- Physical Cleaning: Dust buildup can impede airflow and cause overheating. Periodically (every few months) power down the server, open the case, and clean out dust using compressed air. [21]
Setting a schedule for these tasks (e.g., weekly updates, monthly log checks, quarterly dust cleaning) makes maintenance manageable.
When Things Go Wrong: Basic Troubleshooting
Even well-maintained servers can encounter problems. Troubleshooting is a skill learned through practice, involving logical deduction and systematic testing. Here’s a beginner’s approach to common issues: [20:3] [22] [21:1] [23]
General Troubleshooting Mindset:
- Don’t Panic: Stay calm and methodical.
- Identify the Exact Problem: What exactly isn’t working? When did it start? Were there recent changes?
- Check the Obvious: Power cables plugged in? Network cables connected? Service running?
- Read Error Messages: Error messages often contain vital clues. Copy and paste them into a search engine. [22:1] [23:1]
- Check Logs: System logs (
/var/log/) and application-specific logs are invaluable. Look for errors or warnings around the time the problem occurred. [20:4] [22:2] - Isolate the Issue (Divide and Conquer): Can you ping the server? Can you SSH in? Is it one service or the whole server? Is it affecting one client device or all? [21:2] [23:2]
- Reproduce the Problem: Can you reliably make the error happen again?
- Test One Change at a Time: Don’t change multiple things at once. Make one change, test. If it doesn’t work, revert the change before trying something else.
- Search Online: Use specific error messages, software names, and OS versions in your searches. Forums (like Reddit’s r/homelab, r/homeserver, specific software forums) and official documentation are great resources. [21:3]
Common Problem Areas:
- Server Won’t Boot / No Power:
- Network Connectivity Issues:
- Cannot reach server:
- Check server power status.
- Check network cable connections (both ends). Check link lights on Ethernet port.
- Verify server’s IP address (
ip aon server). Is it static or DHCP? Did it change? - Try pinging the server’s IP from another device on the network.
- Try pinging the router/gateway from the server (
ping your_router_ip). - Check firewall rules (
sudo ufw status) – is the required port allowed? - Restart server, router, and client device. [5:30] [21:5] [23:4]
- Slow network speeds:
- Check resource usage on server (
htop). Is CPU/RAM maxed out? - Check network usage (
iftop). Is something saturating the connection? - Test speed between client and server (e.g., using
iperf3). - Check network cables (try different ones).
- Check router/switch performance. [21:6]
- Check resource usage on server (
- Cannot reach server:
- Software/Service Issues:
- Service not running/accessible:
- Check service status:
sudo systemctl status <service_name>(e.g.,sudo systemctl status nginx). - Try restarting the service:
sudo systemctl restart <service_name>. - Check service-specific logs for errors (location varies, check documentation).
- Check firewall rules.
- Check service configuration files for typos or errors.
- Check service status:
- Application crashing/errors:
- Service not running/accessible:
- Hardware Issues (Overheating, Drive Failure):
- Overheating: Check CPU/system temperatures (tools like
sensorson Linux). Clean dust from fans and heatsinks. Ensure case fans are working and airflow is unobstructed. [21:7] - Drive Issues: Check SMART status (
sudo smartctl -a /dev/sdX). Listen for unusual clicking noises (indicative of HDD failure). Check logs for disk errors. If a drive fails in a RAID array, follow procedures to replace it (consult OS/RAID documentation). [5:31]
- Overheating: Check CPU/system temperatures (tools like
Troubleshooting takes patience. Documenting your steps and findings can be helpful if the problem recurs or if you need to ask for help online.
Conclusion: Your Server Journey Begins
Building your first personal server is a rewarding project that puts you firmly in control of your digital life. From choosing the right budget-friendly hardware (with a little help from Jabardeal!) and selecting a versatile OS like Ubuntu Server, to assembling the components, configuring services, and implementing security measures – you’ve learned the fundamentals.
It might seem like a lot, but remember the core benefits: unparalleled privacy, endless customization, significant long-term cost savings, and an incredible learning opportunity. You’ve built more than just a machine; you’ve built a platform for experimentation, self-sufficiency, and maybe even your next big idea.
Don’t let the occasional troubleshooting hiccup deter you. Every challenge overcome deepens your understanding and makes you a more capable tech user. The vibrant online communities around Linux, home servers, and specific software are always there to help.
Your next step? Start planning! Define what you want your server to do. Research component prices and compatibility (check out PCPartPicker!). Explore OS options like Ubuntu Server, TrueNAS Scale, or OpenMediaVault in more detail. And when you’re ready to buy hardware, remember to look for those unbeatable deals to maximize your ROI.
Welcome to the world of self-hosting. Enjoy the power, the privacy, and the process!
Ready to start pricing out your build? Explore affordable self-hosting hardware deals on Jabardeal today!
References:
What are the benefits of having a personal server? – gbtimes.com ↩︎
Hardware: Key Components Explained-2025 – smbdtech.com ↩︎ ↩︎ ↩︎ ↩︎ ↩︎ ↩︎ ↩︎ ↩︎ ↩︎ ↩︎ ↩︎ ↩︎ ↩︎ ↩︎ ↩︎ ↩︎ ↩︎ ↩︎ ↩︎ ↩︎ ↩︎ ↩︎ ↩︎ ↩︎ ↩︎
Essential Computer Components For Your Next PC Build – computercity.com ↩︎ ↩︎ ↩︎ ↩︎ ↩︎ ↩︎ ↩︎ ↩︎ ↩︎ ↩︎ ↩︎ ↩︎ ↩︎ ↩︎ ↩︎ ↩︎ ↩︎ ↩︎ ↩︎ ↩︎ ↩︎ ↩︎ ↩︎ ↩︎ ↩︎
Computer Hardware Parts: A Complete Guide – pcmoz.co.uk ↩︎ ↩︎ ↩︎ ↩︎ ↩︎ ↩︎
Build Your Own Home Server: A Step-by-Step Guide for 2025 – toxigon.com ↩︎ ↩︎ ↩︎ ↩︎ ↩︎ ↩︎ ↩︎ ↩︎ ↩︎ ↩︎ ↩︎ ↩︎ ↩︎ ↩︎ ↩︎ ↩︎ ↩︎ ↩︎ ↩︎ ↩︎ ↩︎ ↩︎ ↩︎ ↩︎ ↩︎ ↩︎ ↩︎ ↩︎ ↩︎ ↩︎ ↩︎ ↩︎
Best PC Builds for Gaming/VR (Ultimate 2025 Guide) – build-gaming-computers.com ↩︎ ↩︎ ↩︎ ↩︎ ↩︎ ↩︎ ↩︎ ↩︎ ↩︎ ↩︎ ↩︎ ↩︎ ↩︎ ↩︎ ↩︎ ↩︎ ↩︎ ↩︎ ↩︎ ↩︎
10 Best Open source NAS or SAN Software 2025 – how2shout.com ↩︎ ↩︎ ↩︎
Home Server OS: The Best Beginner-Friendly Options in 2025 – innocentmichael.org ↩︎ ↩︎ ↩︎ ↩︎ ↩︎ ↩︎ ↩︎ ↩︎ ↩︎ ↩︎ ↩︎ ↩︎ ↩︎ ↩︎
Guide to Setting Up Plex Media Server in 2025 – rapidseedbox.com ↩︎ ↩︎ ↩︎ ↩︎
Best NAS & media server distro of 2025 – techradar.com ↩︎ ↩︎ ↩︎ ↩︎ ↩︎ ↩︎ ↩︎ ↩︎ ↩︎
Best Linux server distro of 2025 – techradar.com ↩︎ ↩︎ ↩︎ ↩︎ ↩︎ ↩︎
Top 10 Linux Server Operating Systems for 2025 – dedirock.com ↩︎ ↩︎ ↩︎ ↩︎
Best OS for Home Servers | Ubuntu, Unraid, TrueNAS & More in 2025 – kextcache.com ↩︎
14 Best operating systems for a NAS/File server as of 2025 – slant.co ↩︎ ↩︎
Microsoft Windows Server 2025 Installation Guide – dell.com ↩︎
Complete Guide to In-Place Upgrade for Windows Server 2025 – windowsforum.com ↩︎
How to Set Up Plex Media Server (Mega Guide for 2025) – troypoint.com ↩︎
Building a Home Media Server: A Step-by-Step Guide – network-guides.com ↩︎
How To Set Up a Home Media Server: Steps for Beginners – umatechnology.org ↩︎ ↩︎ ↩︎ ↩︎ ↩︎
Troubleshooting Examples: Practical Solutions for Common Issues – onlinetoolguides.com ↩︎ ↩︎ ↩︎ ↩︎ ↩︎ ↩︎ ↩︎ ↩︎
Troubleshooting Common Coding Errors: A Guide for Beginners – algocademy.com ↩︎ ↩︎ ↩︎ ↩︎
A Quick Guide to Basic Troubleshooting for Beginners – dev.to ↩︎ ↩︎ ↩︎ ↩︎ ↩︎ ↩︎